Historically my experience in design has leaned towards games that leverage strong systems such as progression systems, level ups, inventory, skills and upgrades. This game jam I decided to focus on a completely different area of design which some designers refer to as Synesthesia. Strictly speaking Synesthesia causes people to experience one sense as a different one - but in video games people sometimes colloquially use the term to describe games which base a large amount of their fun on the sensory experience: music and rhythm games being chief among them.
If you haven't played the game yet - now's a good time to try it out. Click here to check it out! (If you're a Ludum Dare participant please vote for me too! .

I knew I was on to something really early on because my first playable after the first night had terrible art, almost no sound presence but was already pretty fun.
 |
| The game after 6 hours of development. |
When I was adding bounce sounds to the food objects I knew I wanted the bounces to sound slightly different from each other and then took the idea a bit further to make the bounces play different sounds. Unsure of what sounds to make them play I tried grabbing 6 sound samples on the Pentatonic scale and had the trampoline choose among them randomly on each bounce. I had become familiar with the Pentatonic scale from watching Bobby McFerrin's TED talk which I highly recommend if you haven't seen it already.
I knew I wanted people to play the game for 5-10 minutes. I didn't want a game experience that was only 1 minute long, but I also didn't want people to grind out endlessly on progression systems. Since the bouncing of the balls meant that the gameplay was deterministic the answer seemed obvious to me: art content.
Players like to be surprised. Sometimes you can surprise them with a cool new enemy, or a new ability, and players tend to really love dramatically new art. I decided right away that the game would focus on 5 tightly tuned levels that each featured their own art. I didn't know at the start that I would eventually also do custom music and sound samples for each stage.
 |
| The panda level got drawn first and took about 4 hours. This made me confident I could draw 4 more levels before the end of the game jam. |
A big challenge was getting the notes to fall in interesting patterns. For about half of the game jam I just had the notes generated according to a fixed pattern that repeated over and over. I realized right away I do not want people having to be in 2 places at once, that is simply too frustrating. So I feel back on my tried and true game jam technique - using pixels in an image to specify level data. In this case, black and white pixels in a Photoshop file would specify the spawn points for food.
| The image is read from left to right, top to bottom. The black pixels represent "spawn food". |
In case that's confusing I drew the following illustration to show how the pixels turn into food spawns.
In order to use this technique effectively in Unity you need to make sure you import your textures with filtering and compression turned off - otherwise your image obtains compression artifacts or anti-aliasing which causes the information to get lost.

After playtesting a lot I realized that part of allowing a level to feel satisfying and "complete" I needed to end on a closing note on the Pentatonic scale so whenever you reach the end of the level the animal ALWAYS forces the lowest note to be played. This tiny change made the game feel WAY better - prior to that the level would often end with the player having this sense that the level was not truly complete.
Another polish detail to really give that closing sense of satisfaction to every level is to make every level end with a very easy sequence of notes. I don't want the player to mess up and drop some food near the end causing the song to feel like it came to an abrupt end. This doubles down on that sense of completion at the end of every level.
Selecting which level to play next was very challenging with two button controls. This is the part of the game I'm least happy about. I really don't like the 2-second delay. I had debated making it so you spin the 5 levels on a carousel by moving right and then 'select the level by pressing left but I felt really strongly that the player needed to learn how to move their character consistently from the very beginning. Had it not been for the 2-button restriction I definitely would not have done the level select this way.
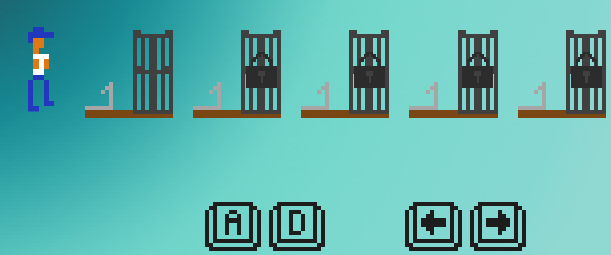 |
| Level select is definitely sub-optimal but at least it fit the 2 button controls restriction. |
It's interesting in watching people playtest the game since the game jam ended how many players I've seen instinctively reach for their mouse as soon as a level ends and the congratulatory screen comes up.
A minor crisis occurred Saturday night when I uploaded a WebGL build and then discovered the background music was not sync'ing to the action! I don't know if the latency was due to WebGL in Unity or Chrome's implementation but either way the desync between the rhythm and the bounces was unacceptable. I fiddled with various appraoches for about 5 hours and finlaly settled on generating all the drumline music for the levels as a single 4-bar clip that is forcibly started at the start of each measure by the game object that spawns the food. This helps to ensure that if the audio of one of the systems does desync, at least they desync together.
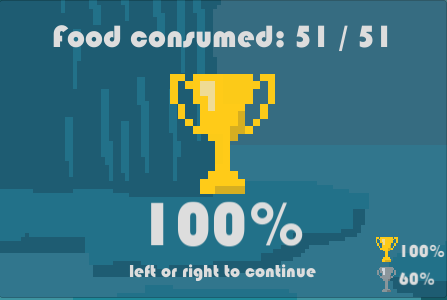
The finishing touch on the game was adding the score and trophy system. Since the game has a strong Rock Band vibe to it, even though the mechanics are different, I knew that players would enjoy getting 100%. I added the code to award a silver trophy for finishing the level with at least 60% and a gold trophy with 100%.